Seata使用手册
简介
Seata 是一款开源的分布式事务解决方案,致力于在微服务架构下提供高性能和简单易用的分布式事务服务。Seata 将为用户提供了 AT、TCC、SAGA 和 XA 事务模式,为用户打造一站式的分布式解决方案。
全局锁 本地锁 二阶段提交
支持的事务模式
AT(Atomicity Transaction)
AT事务模式是一种基于数据库的两阶段提交协议实现的分布式事务模式。在AT模式中,每个参与者在事务提交前会执行本地事务并记录一个事务日志,事务日志用于回滚操作。在提交阶段,协调者向所有参与者发送提交或回滚请求,若为回滚请求参与者根据事务日志执行回滚操作。
前提
- 基于支持本地ACID事务的关系型数据库。
- Java应用,通过JDBC访问数据库。
整体机制
两阶段提交协议的演变:
- 一阶段:解析本地事务sql,查询前镜像,将前镜像以及业务sql等相关信息组成一条回滚日志记录。本地事务提交前,申请全局事务锁,获取成功后,将业务数据和回滚日志记录在同一个本地事务中提交,释放本地锁和连接资源。
- 二阶段:
- 提交:收到TC的分支提交请求后,将请求放到一个异步任务队列中,马上返回提交成功结果给TC。异步任务阶段的分支提交将异步和批量删除相应的undo log记录。
- 回滚:开启一个本地事务,根据xid和branchid查找相应的undo log记录,将当前记录数据与undo log记录数据进行比较。如果相同则,执行一阶段的回滚日志进行反向补偿。如果不同,说明数据被全局事务之外的动作修改了,这种情况根据配置的策略来进行处理。
TCC(Try Confirm Cancel)
补偿型分布式事务,需要每一个参与者实现自己的Try、Confirm、Cancel方法。Try阶段,所有参与者执行本地事务并预留提交事务的资源,本地事务执行完毕后告知事务管理器Try阶段执行结果。事务管理器根据Try阶段的执行结果,发起Confirm或Cancel请求,参与者再执行Confirm事务提交操作或Cancel事务回滚操作。
SAGA
SAGA事务模式是一种长事务模式,通过一系列连续的本地事务操作实现分布式事务
XA(eXtended Architecture Transaction)
XA事务模式是一种通过协调器(Coordinator)和参与者(Participants)之间的通信和协商实现的分布式事务模式
角色
- AP(Applicaiton)-应用系统:微服务或需执行事务的应用。
- TC(Transaction Coordinator)-事务协调者:维护全局和分支事务的状态,驱动全局事务提交或回滚。
- TM(Transaction Manager)-事务管理器:定义全局事务的范围:开始全局事务、提交或回滚全局事务。
- RM (Resource Manager) - 资源管理器:管理分支事务处理的资源,与TC交谈以注册分支事务和报告分支事务的状态,并驱动分支事务提交或回滚。
参数配置
关注属性
| server端 | client端 |
|---|---|
| registry.type | registry.type |
| config.type | config.type |
| #store.mode=db需要以下配置 | service.vgroupMapping.my_test_tx_group |
| store.db.driverClassName | service.default.grouplist |
| store.db.url | service.disableGlobalTransaction |
| store.db.user | |
| store.db.password | |
| #store.mode=redis 需要以下配置 | |
| store.redis.host | |
| store.redis.port | |
| store.redis.database | |
| store.redis.password |
公共配置
- registry.type:注册中心类型。默认file,支持file 、nacos 、redis、eureka、zk、consul、etcd3、sofa、custom。
- config.type:配置中心类型。默认file,支持file、nacos 、apollo、zk、consul、etcd3、springcloud、custom。
相当于seata组件有自己的配置中心和注册中心,只为seata服务。
使用nacos作为注册中心
seata:
  config:
    # support: nacos 、 consul 、 apollo 、 zk  、 etcd3
    type: nacos
    nacos:
      server-addr: 127.0.0.1:8848
      namespace:
      group: SEATA_GROUP
      username:
      password:
      context-path:
      ##if use MSE Nacos with auth, mutex with username/password attribute
      #access-key:
      #secret-key:
      #仅支持properties
      data-id: seataServer.properties
  registry:
    # support: nacos 、 eureka 、 redis 、 zk  、 consul 、 etcd3 、 sofa
    type: nacos
    preferred-networks: 30.240.*
    nacos:
	# applicaiton为seata-server服务端向nacos注册的名称
      application: seata-server
      server-addr: 127.0.0.1:8848
      group: SEATA_GROUP
      namespace:
      cluster: default
      username:
      password:
      context-path:
      ##if use MSE Nacos with auth, mutex with username/password attribute
      #access-key:
      #secret-key:
Server配置
- store.mode:事务会话信息存储方式。file本地文件(不支持HA),db数据库,redis(支持HA)。
store.mode=db模式
- store.db.datasource:db模式数据源类型,数据库连接池类型。dbcp、druid、hikari;无默认值,store.mode=db时必须指定。
- store.db.dbType:db模式数据库类型。mysql、oracle、db2、sqlserver、sybaee、h2、sqlite、access、postgresql、oceanbase;无默认值,store.mode=db时必须指定。
- store.db.driverClassName:db模式数据库驱动。store.mode=db时必须指定。
- store.db.url:store.mode=db时必须指定,在使用mysql作为数据源时,建议在连接参数中加上
rewriteBatchedStatements=true。
在store.mode=db,由于seata是通过jdbc的executeBatch来批量插入全局锁的,根据MySQL官网的说明,连接参数中的rewriteBatchedStatements为true时,在执行executeBatch,并且操作类型为insert时,jdbc驱动会把对应的SQL优化成
insert into () values (), ()的形式来提升批量插入的性能。 根据实际的测试,该参数设置为true后,对应的批量插入性能为原来的10倍多,因此在数据源为MySQL时,建议把该参数设置为true。
- store.db.user:db模式数据库账户。store.mode=db时必须指定。
- store.db.password:db模式数据库账户密码。store.mode=db时必须指定。
store.mode=redis模式
- store.redis.host:redis模式ip。默认127.0.0.1。
- store.redis.port:redis模式端口。默认6379。
- store.redis.database:redis模式默认库。默认0。
- store.redis.password:redis模式密码(无可不填)。默认null。
Client配置
- seata.enabled:是否开启spring-boot自动装配。true、false,(SSBS)专有配置,默认true(附录4)。
- seata.enableAutoDataSourceProxy:是否开启数据源自动代理。true、false,seata-spring-boot-starter(SSBS)专有配置,SSBS默认会开启数据源自动代理,可通过该配置项关闭。
- seata.data-source-proxy-mode:默认为AT,如果需要使用XA模式,配置为XA即可。
- service.disableGlobalTransaction:全局事务开关。默认false。false为开启,true为关闭。
- **seata.tx-service-group=default_tx_group:配置事务分组
- seata.service.vgroup-mapping.default_tx_group=default:配置事务分组与集群的映射关系
- seata.service.grouplist.default=127.0.0.1:8091:配置名为default的集群的各个seata-server节点信息。当seata.registry.type=file时需要配置。当为seata.registry.type=nacos,可以从nacos中获取。
- seata.registry.nacos.server-addr=nacos注册中心IP:端口
- seata.registry.nacos.application=seata-server:可以直接指定Seata服务名(应与seata-server实际注册的服务名一致)
- seata.registry.nacos.group=SEATA_GROUP:Seata分组名(应与seata-server实际注册的分组名一致)
事务分组
- 事务分组:seata的资源逻辑,可以按微服务的需要,在应用程序(客户端)对自行定义事务分组,每组取一个名字,通过
seata.tx-service-group配置。 - 集群:seata-server服务端一个或多个节点组成的集群cluster。 应用程序(客户端)使用时需要指定事务逻辑分组与Seata服务端集群的映射关系,通过seata.service.vgroup-mapping.事务分组名=集群名称 配置。
- 集群列表:file模式下,使用seata.service.grouplist.default=127.0.0.1:8091配置seata服务列表。使用nacos时,根据nacos服务地址、nacos的命名空间、clusterName在注册中心找到真是的TC服务列表。
为什么这么设计,不直接取服务名?
这里多了一层获取事务分组到映射集群的配置。这样设计后,事务分组可以作为资源的逻辑隔离单位,出现某集群故障时可以快速failover,只切换对应分组,可以把故障缩减到服务级别,但前提也是你有足够server集群。
Seata的API支持
Seata API 分为两大类:High-Level API 和 Low-Level API :
- High-Level API :用于事务边界定义、控制及事务状态查询。
- Low-Level API :用于控制事务上下文的传播。
High-Level API
- GlobalTransaction(全局事务):包括开启事务、提交、回滚、获取当前状态等方法。
- GlobalTransactionContext(全局事务上下文):GlobalTransaction 实例的获取需要通过 GlobalTransactionContext
- TransactionalTemplate(事务化模板):通过上述 GlobalTransaction 和 GlobalTransactionContext API 把一个业务服务的调用包装成带有分布式事务支持的服务。
异常类型:
- BeginFailure (开启事务失败):getCause() 得到开启事务失败的框架异常,getOriginalException() 为空。
- CommitFailure (全局提交失败):getCause() 得到全局提交失败的框架异常,getOriginalException() 为空。
- RollbackFailure (全局回滚失败):getCause() 得到全局回滚失败的框架异常,getOriginalException() 业务应用的原始异常。
- RollbackDone (全局回滚成功):getCause() 为空,getOriginalException() 业务应用的原始异常。
Low-Level API
- RootContext(事务的根上下文):负责在应用的运行时,维护 XID 。
事务传播
Seata 全局事务的传播机制就是指事务上下文的传播,根本上,就是 XID 的应用运行时的传播方式。
- 服务内部的事务传播。默认的,RootContext 的实现是基于 ThreadLocal 的,即 XID 绑定在当前线程上下文中。
- 跨服务调用的事务传播。跨服务调用场景下的事务传播,本质上就是要把 XID 通过服务调用传递到服务提供方,并绑定到 RootContext 中去。
跨微服务链路的事务需要对相应 RPC 框架支持,目前 seata-all 中已经支持:Apache Dubbo、Alibaba Dubbo、sofa-RPC、Motan、gRpc、httpClient,对于 Spring Cloud 的支持,请引用 spring-cloud-alibaba-seata。其他自研框架、异步模型、消息消费事务模型需结合 API 自行支持。
RestTemplate支持
要手动实现RestTemplate对Seata的支持,需要完成三步。
- 一是上游服务实现拦截器ClientHttpRequestInterceptor接口,在REST请求头添加TX_XID。
public class SeataRestTemplateInterceptor implements ClientHttpRequestInterceptor {
    @Override
    public ClientHttpResponse intercept(HttpRequest request, byte[] body, ClientHttpRequestExecution execution) throws IOException {
        HttpRequestWrapper httpRequestWrapper = new HttpRequestWrapper(request);
        String xid = RootContext.getXID();
        if (StringUtils.isNotEmpty(xid)) {
            httpRequestWrapper.getHeaders().add(RootContext.KEY_XID, xid);
        }
        return execution.execute(httpRequestWrapper, body);
    }
}- 二是给RestTemplate对象添加上面自定义实现的拦截器。下面代码通过Spring配置类,给容器中所有RestTemplate bean添加上拦截器。
@Configuration
public class SeataRestTemplateAutoConfiguration {

    @Autowired(required = false)
    Collection<RestTemplate> restTemplates;

    private SeataRestTemplateInterceptor seataRestTemplateInterceptor = new SeataRestTemplateInterceptor();

    @PostConstruct
    public void init() {
        for (RestTemplate restTemplate : restTemplates) {
            List<ClientHttpRequestInterceptor> interceptors = restTemplate.getInterceptors();
            interceptors.add(seataRestTemplateInterceptor);
            restTemplate.setInterceptors(interceptors);
        }
    }
}- 三是下游服务实现过滤器Filter接口,在请求进来时从请求头获取TX_XID,使用
RootContext.bind(xid);绑定到全局事务中,在回复响应前使用RootContext.unbind();解绑全局事务。
@Component
public class SeataFilter implements Filter {
    @Override
    public void init(FilterConfig filterConfig) throws ServletException {
    }

    @Override
    public void doFilter(ServletRequest request, ServletResponse response, FilterChain chain) throws IOException, ServletException {
        HttpServletRequest httpServletRequest = (HttpServletRequest) request;
        String xid = httpServletRequest.getHeader(RootContext.KEY_XID);
        boolean isBind = false;
        if (StringUtils.isNotEmpty(xid)) {
            RootContext.bind(xid);
            isBind = true;
        }
        try {
            chain.doFilter(request, response);
        } finally {
            if (isBind) {
                RootContext.unbind();
            }
        }
    }

    @Override
    public void destroy() {
    }
}
SQL支持
Seata 事务目前支持 INSERT、UPDATE、DELETE 三类 DML 语法的部分功能。
使用限制
- 不支持 SQL 嵌套
- 不支持多表复杂 SQL(自1.6.0版本,MySQL支持UPDATE JOIN语句)
- 不支持存储过程、触发器
- 部分数据库不支持批量更新,在使用 MySQL、Mariadb、PostgreSQL9.6+作为数据库时支持批量
DML语句
| 类型 | sql实例 |
|---|---|
| INSERT | insert into table(col,...) values(expr,...) |
| UPDATE | update table set col=expr,... [WHERE where_definition] |
| DELETE | delete from table [WHERE where_definition] |
| SELECT | select expr,... from table [WHERE where_definition] |
| UPDATE JOIN | UPDATE tb1_name tb1 JOIN tb2_name tb2 ON tb2.col_name=tb1.col_name SET tb1.col_name1=expr1 [, tb1.col_name2=expr2 ...][ [WHERE where_definition] |
SQL修饰
Seata的隔离级别默认为读未提交,要让Seata达到读已提交,使用for update代理。在读已提交模式下,select语法仅能部分支持。
读已提交模式下:
- 支持:
AND & OR、ORDER BY、GROUP BY、LIKE、通配符、EXISTS、IN、BETWEEN、ON DUPLICATE、ALIASES、TOP、LIMIT。 - 不支持:
JOININNER JOINLEFT JOINRIGHT JOINFULL JOIN、UNIONUNION ALLSELECT INTO
APM应用性能监控
SkyWalking
SkyWalking 是 Seata 组件中重要的APM(应用性能监控)实现。
Seata 涉及的重要参数有:
| 参数 | 备注 |
|---|---|
| skywalking.plugin.seata.server | 布尔属性,当值为true,标识本应用服务是否为Seata server |
| skywalking.plugin.jdbc.trace_sql_parameters | 布尔属性,当值为true,本应用服务记录sql参数 |
| skywalking.agent.service_name | 字符串属性,标识本应用服务在SkyWalking的唯一标识 |
Seata客户端探针参数可参考
java -javaagent:{path}/skywalking-agent.jar -Dskywalking.agent.service_name=seata_biz -Dskywalking.plugin.jdbc.trace_sql_parameters=true -jar seata_biz.jarSeata服务端探针参数可参考
java -javaagent:{path}/skywalking-agent.jar -Dskywalking.agent.service_name=seata_tc -Dskywalking.plugin.jdbc.trace_sql_parameters=true -Dskywalking.plugin.seata.server=true -jar seata_tc.jarPrometheus Metrics
Seata支持在TC(事务协调者)开启Metrics数据采集并输出到Prometheus监控系统中。
业务系统集成Client
步骤一:添加seata依赖(建议单选)
- 依赖seata-all
- 依赖seata-spring-boot-starter,支持yml、properties配置(.conf可删除),内部已依赖seata-all
- 依赖spring-cloud-alibaba-seata,内部集成了seata,并实现了xid传递
步骤二:undo_log建表、配置参数(仅AT模式)
脚本地址:https://github.com/seata/seata/blob/2.x/script/client/at/db/mysql.sql,在业务数据库内建表
步骤三:数据源代理(不支持自动和手动配置并存)
步骤四:初始化GlobalTransactionScanner
步骤五:实现xid跨服务传递
- 手动 参考源码integration文件夹下的各种rpc实现 module
- 自动 springCloud用户可以引入spring-cloud-starter-alibaba-seata,内部已经实现xid传递
部署
本地直接部署
$ sh ./bin/seata-server.sh -p 8091 -h 127.0.0.1 -m file-p:server服务的启动端口-h:指定在注册中心注册的ip地址-m:事务日志存储方式-n:用于指定seata-server节点ID。如1,2,3...,默认为1-e:指定 seata-server 运行环境,启动时会加载application-dev.yaml这样的配置。
控制台地址:http://127.0.0.1:7091/#/login,默认账号密码:seata/seata
- seata控制台端口取自配置
server.port,默认7091。 - seata服务端口取自配置
seata.server.service-port,默认为server.port+1000,即8091。
使用nacos作为注册中心、配置中心部署
- 需要修改application.yaml文件下seata.config.type和seata.registry.type的配置为nacos。
seata\script\config-center\config.txt文件下的配置项都可以配置在配置中心,其余seata配置项只能配置在application.yaml中。- 当db为mysql8.0时,需要修改
store.db.driverClassName=com.mysql.cj.jdbc.Driver,并更换jdbc驱动。
高可用部署
seata-server节点本身无状态,状态数据存储在db中。要实现高可用部署,可通过部署多个server节点,服务注册到注册中心,共享同一个db。因此,file模式下无法实现高可用,除非实现文件共享。
Spring Boot集成Seata
这个例子里使用了mysql作为数据库、restTemplate调用下游服务、nacos作为配置中心和注册中心。
- 上下游微服务应用需要引入seata、mysql、nacos、web、jdbc相关依赖。
<dependencies>
    <dependency>
        <groupId>org.springframework.boot</groupId>
        <artifactId>spring-boot-starter-web</artifactId>
    </dependency>
    <dependency>
        <groupId>org.springframework.boot</groupId>
        <artifactId>spring-boot-starter-jdbc</artifactId>
    </dependency>
    <dependency>
        <groupId>io.seata</groupId>
        <artifactId>seata-spring-boot-starter</artifactId>
    </dependency>
    <dependency>
        <groupId>mysql</groupId>
        <artifactId>mysql-connector-java</artifactId>
    </dependency>
    <dependency>
        <groupId>org.mybatis.spring.boot</groupId>
        <artifactId>mybatis-spring-boot-starter</artifactId>
    </dependency>
    <dependency>
        <groupId>org.projectlombok</groupId>
        <artifactId>lombok</artifactId>
    </dependency>
    <dependency>
        <groupId>com.alibaba.nacos</groupId>
        <artifactId>nacos-client</artifactId>
    </dependency>
    <dependency>
        <groupId>org.springframework.boot</groupId>
        <artifactId>spring-boot-starter-test</artifactId>
        <scope>test</scope>
    </dependency>
    <dependency>
        <groupId>com.chenzhuowen</groupId>
        <artifactId>seata-spring-boot-study-common-service</artifactId>
        <version>0.0.1-SNAPSHOT</version>
    </dependency>
</dependencies>- 上下游微服务应用的配置文件中加入seata相关配置。
mybatis:
  configuration:
    log-impl: org.apache.ibatis.logging.stdout.StdOutImpl
  mapper-locations: classpath:mapper/*.xml
server:
  port: 7101

spring:
  application:
    name: seata-spring-boot-study-customer-service
  datasource:
    password: 123456
    url: jdbc:mysql://127.0.0.1:3306/test
    username: root
seata:
  tx-service-group: default_tx_group
  config:
    type: nacos
    nacos:
      data-id: seataClient.properties
      group: SEATA_GROUP
      namespace: dev
      username: nacos
      password: nacos
      server-addr: 127.0.0.1:8848
  registry:
    type: nacos
    nacos:
      application: seata-server1
      server-addr: 127.0.0.1:8848
      group: SEATA_GROUP
      namespace: dev
      password: nacos
      username: nacos
application-id: customer-service- 编写httpclient使用RestTemplate调用下游服务的。
@Component
public class CustomerClient {
    @Autowired
    RestTemplate restTemplate;

    public void reduceBalance(int customerId, BigDecimal money) {
        MultiValueMap multiValueMap = new LinkedMultiValueMap();
        multiValueMap.add("id", customerId);
        multiValueMap.add("money", money);
        Integer result = restTemplate.postForObject("http://localhost:7101/customer/reduceBalance", multiValueMap, Integer.class);
        System.out.println("值为:" + Optional.ofNullable(result).map(c -> c.toString()).orElse("null"));
    }
}- 编写service调用下游微服务,使用
@GlobalTransactional注解方法。
@Service
public class BusinessService {

    @Autowired
    CustomerClient customerClient;

    @Autowired
    OrderClient orderClient;

    @GlobalTransactional
    public void purchase(int customerId, int count, int productId) {
        Order order = new Order();
        order.setCustomerId(customerId);
        order.setProductId(productId);
        order.setCount(count);
        order.setMoney(BigDecimal.valueOf(new Random(System.currentTimeMillis()).nextLong(1000)));
        orderClient.createOrder(order);
        customerClient.reduceBalance(customerId, order.getMoney());
    }
}- 编写common-starter模块,common模块向容器注入自定义Filter,向容器中的RestTemplate对象添加拦截器。
- 自定义Filter,filter拦截servlet请求,从请求头中获取全局事务xid并绑定,在请求结束时解绑全局事务。
@Component
public class SeataFilter implements Filter {
    @Override
    public void init(FilterConfig filterConfig) throws ServletException {
    }

    @Override
    public void doFilter(ServletRequest request, ServletResponse response, FilterChain chain) throws IOException, ServletException {
        HttpServletRequest httpServletRequest = (HttpServletRequest) request;
        String xid = httpServletRequest.getHeader(RootContext.KEY_XID);
        boolean isBind = false;
        if (StringUtils.isNotEmpty(xid)) {
            RootContext.bind(xid);
            isBind = true;
        }
        try {
            chain.doFilter(request, response);
        } finally {
            if (isBind) {
                RootContext.unbind();
            }
        }
    }

    @Override
    public void destroy() {
    }
}- 自定义RestTemplate拦截器,拦截器在restTempalte发送请求前,向请求头添加全局事务xid。
public class SeataRestTemplateInterceptor implements ClientHttpRequestInterceptor {
    @Override
    public ClientHttpResponse intercept(HttpRequest request, byte[] body, ClientHttpRequestExecution execution) throws IOException {
        HttpRequestWrapper httpRequestWrapper = new HttpRequestWrapper(request);
        String xid = RootContext.getXID();
        if (StringUtils.isNotEmpty(xid)) {
            httpRequestWrapper.getHeaders().add(RootContext.KEY_XID, xid);
        }
        return execution.execute(httpRequestWrapper, body);
    }
}- 定义Spring配置类,给容器中RestTemplate对象添加拦截器。
@Configuration
public class SeataRestTemplateAutoConfiguration {

    @Autowired(required = false)
    Collection<RestTemplate> restTemplates;

    private SeataRestTemplateInterceptor seataRestTemplateInterceptor = new SeataRestTemplateInterceptor();

    @PostConstruct
    public void init() {
        if (restTemplates != null) {
            for (RestTemplate restTemplate : restTemplates) {
                List<ClientHttpRequestInterceptor> interceptors = restTemplate.getInterceptors();
                interceptors.add(seataRestTemplateInterceptor);
                restTemplate.setInterceptors(interceptors);
            }
        }
    }
}- 将以上需要自动装配的类,配置到
META-INF/spring/org.springframework.boot.autoconfigure.AutoConfiguration.imports文件内。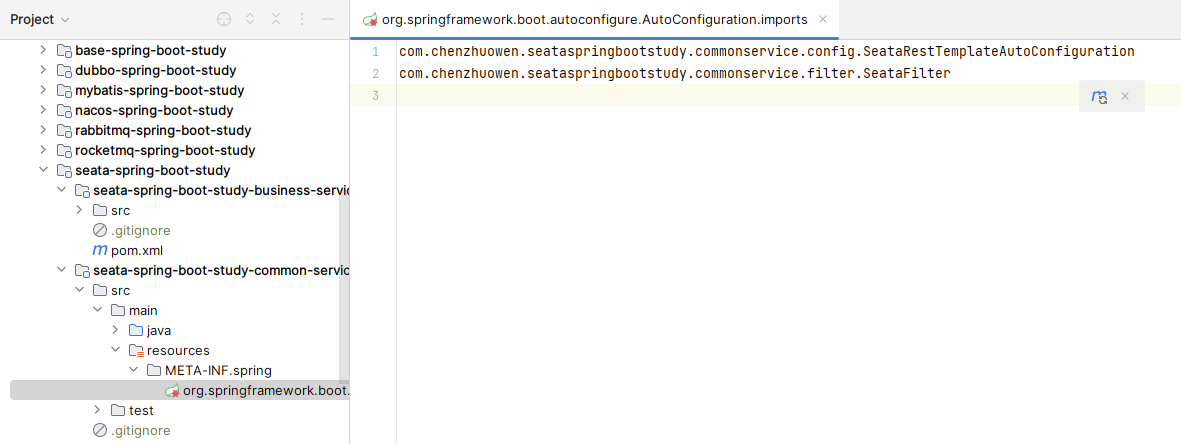
- 启动各微服务,模拟抛出异常,看事务是否正常回滚。
Spring Cloud集成Seata
Spring Cloud集成Seata与Spring Boot集成Seata相比,增加了Spring Cloud相关依赖。
<dependency>
    <groupId>com.alibaba.cloud</groupId>
    <artifactId>spring-cloud-starter-alibaba-seata</artifactId>
</dependency>
<!--nacos服务发现-->
<dependency>
    <groupId>com.alibaba.cloud</groupId>
    <artifactId>spring-cloud-starter-alibaba-nacos-discovery</artifactId>
</dependency>
<!--nacos配置中心-->
<dependency>
    <groupId>com.alibaba.cloud</groupId>
    <artifactId>spring-cloud-starter-alibaba-nacos-config</artifactId>
</dependency>
<dependency>
    <groupId>org.springframework.cloud</groupId>
    <artifactId>spring-cloud-starter-openfeign</artifactId>
</dependency>
<dependency>
    <groupId>org.springframework.cloud</groupId>
    <artifactId>spring-cloud-starter-loadbalancer</artifactId>
</dependency>
spring-cloud-starter-alibaba-seata支持对openfeign的调用传递全局事务id,无需再进行单独配置。
使用@GlobalTransactional开启全局事务
@Service
public class BusinessService {

    @Autowired
    CustomerFeignClient customerFeignClient;

    @Autowired
    OrderFeignClient orderFeignClient;

    @GlobalTransactional
    public void purchase(int customerId, int count, int productId) {
        Order order = new Order();
        order.setCustomerId(customerId);
        order.setProductId(productId);
        order.setCount(count);
        order.setMoney(BigDecimal.valueOf(new Random(System.currentTimeMillis()).nextLong(1000)));
        orderFeignClient.createOrder(order);
        customerFeignClient.reduceBalance(customerId, order.getMoney());
    }
}